New Tools for the Flipped School: Interactive Visual Media in Remote Learning
Over the last few years, teachers and other educators have successfully transitioned their classrooms, lecture halls and labs to the cloud, set up digital learning environments and run courses online – either partly or completely. Although many may have had previous experience from blended learning strategies and a flipped classroom model, this recent transition goes beyond anything that we have seen previously. In short, the whole school system has been flipped!
Online learning and remote learning have been widely adopted practices in higher education, but there is less experience and research of how they work in basic education. This article focuses on the use, potential benefits, and best practices of interactive visual media in online education and remote learning. We will discuss:
- What are the main arguments for interactive visual media in online learning?
- What are some examples and best practices for creating visual learning materials for students?
- How can students use interactive visual media for documenting and sharing their learning?
Meet an expert!
If you’d like to learn more about what ThingLink can offer to your school or district, schedule an online meeting with one of our education experts below.
Quick links:
- Interactive visual media in online education
- Examples of interactive learning materials
- Examples and best practices for creating remote learning materials for students
- Supporting student-centered learning with interactive visual media
- Best practices for developing students’ creativity and digital storytelling skills at home
- How to get started with using interactive visual media in my school district? Do I need to involve the principal or the superintendent?
Interactive visual media in online education
Interactive images, videos, and virtual tours can support online learning by providing an alternative to text-based communication. Here are three arguments for why this is the case.
Humans remember pictures better than words (the “picture superiority effect”) One explanation to this is Allan Paivio’s dual-coding theory from 1971. According to this theory, if we see an image of a banana, our mind stores this stimulus (‘banana”) both as the word ‘banana’ as well as the image of a banana. This ‘dual coding’ increases the chance of remembering the banana better compared to if the stimulus was only coded in our mind as the word.
Multisensory experience triggers simultaneous associations. Pictures, sounds, and words together with a contextual experience of a place can create memorable learning experiences more efficiently than plain images or written words alone that are not associated with anything real. That’s because a simultaneous visual/auditory/verbal stimulus automatically connects our minds with multiple associations about the world. This could be a previous experience or a personal memory that associates with the new word or concept in our minds. While multisensory learning materials (including interacting with images by touching them) help most learners, they are especially helpful for dyslexic or autistic students. Seeing a new word written under a picture and hearing how it is pronounced, helps us understand and remember what we are looking at.
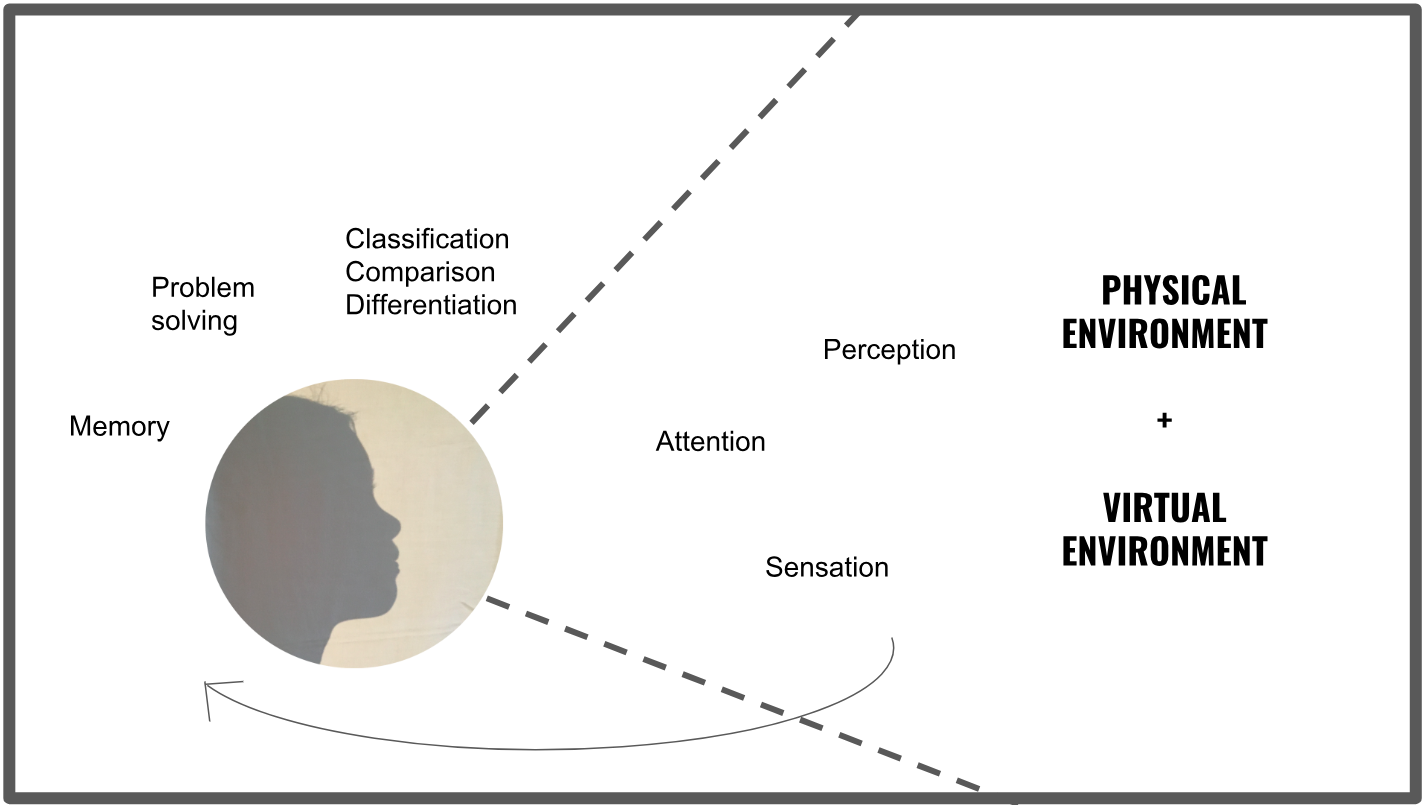
Virtual tours expand our fields of perception from physical to digital. Whereas previously, learning in a real-world context was limited to a student’s physical environment (and maybe the school’s and parents’ travel budget), 360 images and videos are making it possible to travel anywhere virtually. We can remember and learn on a virtual field trip the same way as we learn on a physical field trip. For example, last summer I went to Machu Picchu in a mixed reality headset, but my memory tells me I was there for real. If I went there again, I would recognize the place.
Examples of interactive learning materials
Creating online learning materials, lessons, and assignments does not have to be difficult, time-consuming, or expensive. Interactive videos, audio posters, narrated screenshots, and virtual tours can be effective tools for online education that help educators and learners work together using not only text-based communication, but also voice, video, and images.
Narrated photos, audio posters and screenshots
Working from home or other remote locations requires extra effort in sharing thoughts and progress with others. Hearing the educator repeat instructions for an assignment is important for many students.
A great way for giving assignments or sharing projects is adding voice instructions to various areas of a photo, poster or a screenshot. Whether this is a math assignment or a wireframe of a UI design, short audio notes from a familiar voice can improve comprehension and make an otherwise abstract visualization or assignment feel more meaningful and personal. For educators, recording audio instructions directly to images means saving time on repeating instructions over email.
Interactive videos
Interactive videos can be used for various purposes: interviews, presentations, introductions, explanations, lectures, training and project assignments. Even a short 5-minute video to explain daily goals or project assignments helps learners stay connected with their teacher instead of just receiving text-based instructions via an LMS.
What should I take into account when planning a video lesson?
Equipment: The good news is, you only need your phone or laptop, so there is no need to invest in additional hardware unless you want to.
Setup: A video lesson can be very similar to your lesson in the classroom. You can use a whiteboard, move around, or address students face-to-face sitting in front of your laptop. As much as being a resource for students, think of this video as a resource for yourself; students can replay it as they prepare for a test, or you can share it with absent students who missed your class.
Recording: Find a place with natural light where you feel comfortable, and start recording. The audience is your students so picture them in front of you, and address them as you would in the class. You may even mention some of them by name to keep their attention!
Duration: Our recommendation is you look at the lesson as a whole and divide it into parts, max 10-15 minutes and ideally 6 minutes each. This makes it easier for students to stay engaged and for you to follow their progress. Similar to YouTube, uploading long videos to ThingLink takes some minutes even with strong wifi connection, so make sure you are in a good wifi spot.
Upload specifications:
- Supported file formats: MP4
- Max Video resolution: 3840 x 1920
- Max File size: 2 GB
- Codecs: H264 video codec and AAC audio codec
Virtual tours
Virtual reality lessons and tours have become more common in classroom learning, but how can they be used in distance education?
From a hardware point of view, it is worth noting first that viewing virtual lessons using virtual reality headsets is not a commonly applicable solution for county public schools or city schools because of the simple fact that most families do not have headsets at home. For this reason, when we talk about virtual tours or virtual learning environments in distance learning, we most often refer to 360-degree image or video viewing on mobile devices and desktop.
The first challenge schools or principals and teachers face is lack of virtual lessons that would be aligned with national Common Core or state standards, but still adjustable for individual classrooms. Should educational publishers provide this content to schools or should teachers in every school start building virtual lessons themselves? To answer the question, let’s first take a closer look at the potential teacher-student connection that virtual tours could support in basic and secondary education.
When Google launched Expeditions in 2015, ThingLink team started getting two kinds of emails from teachers. Most wanted to know if we could support 360 image annotation so that teachers could create their own expeditions and tours together with students. The second question concerned the ability to guide the tour to make sure students would pay attention to things that were relevant for the lesson. This one was tricky, because we did not believe in replicating the traditional classroom experience in VR by setting up twenty-five headsets for a shared VR lesson.
Observing elementary or secondary school students viewing a virtual tour, three things seemed to be true: 1) Students benefit from expert guidance: it helps them pay attention to relevant things, 2) Some students need more repetition than others: it should be possible for students to revisit a tour, and 3) Everybody is different: asynchronous viewing can support personalized learning experiences better than synchronous viewing.
The promise of virtual tours in remote learning is to increase teachers’ online instructional time without putting in more hours. This can be done by recording the teacher’s talk, explanations, or instructions to a virtual tour. In this manner students can virtually visit remote places at their own pace and time, but do so in the presence of their own — or another — teacher. The experience would still be shared with fellow students, but viewing would happen asynchronously.
Could a large educational publisher do this? They could definitely provide a course catalog and lesson templates, but in a situation where students are learning from home, it becomes challenging to apply the flipped classroom model with blended online and offline learning strategies. In this situation maintaining a daily connection with students becomes one of the most important aspects to consider. Online students need a whole new learning system. Part of this system is the learning materials we provide to students, and the strategies we use to create them.
Hotspots: what are they and how do they work?
The purpose of the clickable hotspots or tags is to give the viewer further information and resources on the topic they are learning about. Teachers and students can add various types of content in the hotspots, such as text, additional closeup images, video, sound, links and embedded web content such as maps or forms. These resources can serve any of the following functions:
- Building perspective by linking to related materials
- Improving comprehension of the topic by highlighting key concepts and vocabulary
- Zooming into details in a scene
- Creating a feedback loop by including a call to action
In order to create a engaging and effective learning materials, one does not necessarily need to use all the different tag types in one asset, but it’s good to keep these questions in mind when planning new content:
- What other materials or discussions does this learning asset relate to?
- What are the key concepts and academic/professional vocabulary I want my viewers to master?
- Are there any specific details that I want to highlight?
- What is the call-to-action I want to link to this learning asset?

Building perspective by linking to related materials
The purpose of this resource is to connect your image or video to related materials, may that be other videos or articles on the subject, a summary of the lesson, or a snapshot of the learning goals. The resource itself may be a link to another website, an embedded video, slideshow or a map.
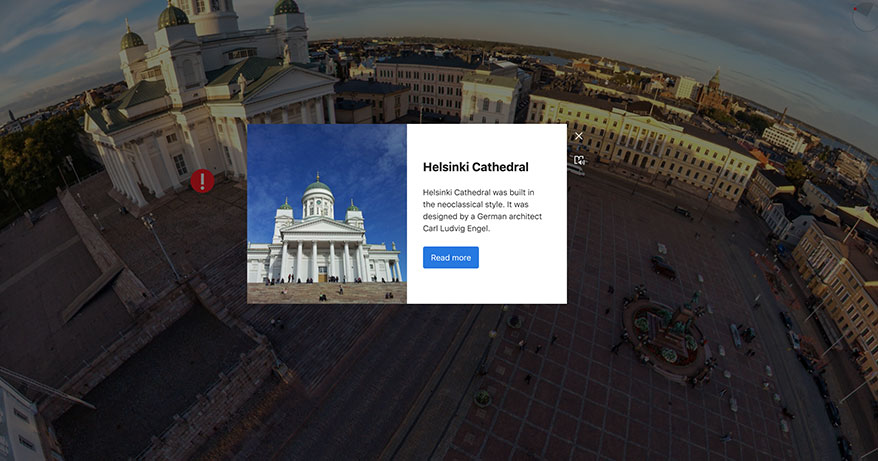
Improving comprehension by highlighting key concepts and vocabulary
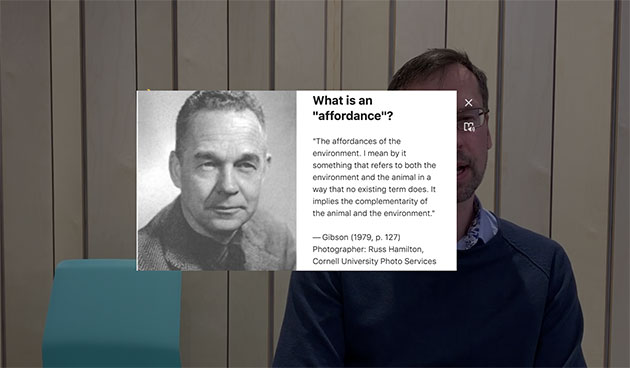
If your poster or video includes new concepts and vocabulary, a good practice for improving comprehension is adding short explanations of each concept using the text and media tag. This tag type can include text, image, audio and links. An additional benefit for viewers is that these tags can be opened in Immersive Reader that includes automatic translation to over 80 languages.
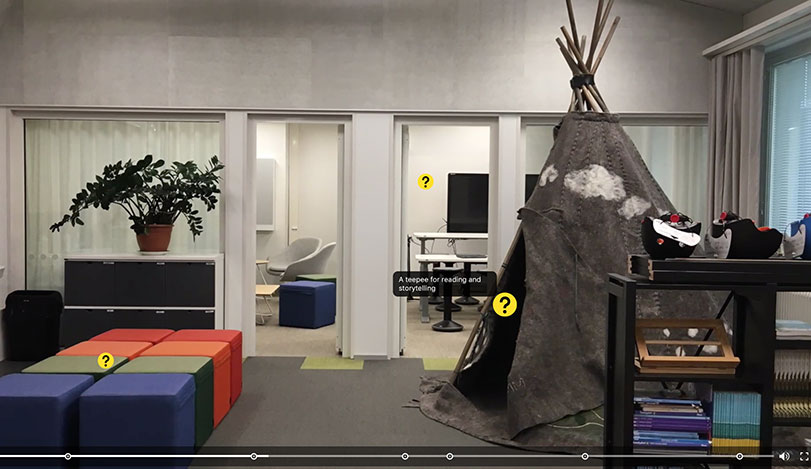
Zooming into details in a scene
If your video lesson takes place in a relevant context for learning, or you are using a whiteboard for solving math problems, you may want to guide students’ attention as you speak and highlight specific details in a scene. A good simple way to do this is use the second tag type, text label.
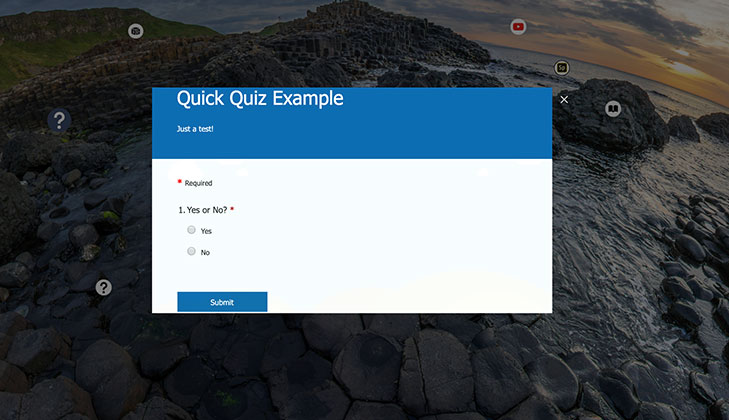
Creating a feedback loop by including a call-to-action
The hardest part of teaching and training remotely is knowing if learners have watched your video or retained any of its content. This is why you want to link your video lesson to further learning activities, may that be some questions to think about, a more formal assignment, or a test. For questionnaires and quizzes, teachers can use embedded Google or Microsoft Forms. It is also possible to share the video to students or team members via an LMS or as a Microsoft Teams assignment.
The importance of teacher training and professional development
In a situation where a teacher may not have the tools, equipment and skills to create engaging and pedagogically sound materials for online learning, it is important to quickly invest in professional learning opportunities and create material for other teachers rather than directly to students. This is a valid argument for why schools also need to make sure their teachers can stay connected with their own learning communities that help them respond to the different learning needs and online learning opportunities together.
Examples and best practices for creating remote learning materials for students
How do elementary and secondary school teachers use interactive images and virtual tours in remote learning? Below is a collection of instructor-led strategies for using interactive media in online learning. Examples range from literacy instruction and language arts to history and religious studies. Rather than being lesson plans, these projects exemplify good practices for maximizing the learning outcomes using audio-visual pedagogy.
1. Explain visuals with text labels
I see a picture of a pyramid, but what am I supposed to pay attention to? Simple annotations help students pay attention to relevant details in images and graphs. In the example below, teacher Irene Londino uses text labels to explain the structure of Egyptian pyramids, and video tags to give more context to the topic.
2. Explain abstract concepts with detailed descriptions
Millions of students have heard about the 17 Sustainable Development Goals, set in 2015 by the United Nations General Assembly, but how many can explain the goals in more detail or take action to reach them? Professor Annamaria Bove from 1. Instituto Comprensivo Nocera Inferiore created a valuable resource for her students and turned the famous UN infographic into an interactive resource, explaining each goal in detail and linking to more information.
3. Explain assignments using your voice
If you like to explain assignments to students verbally, but prefer not to make a selfie video for one reason or another, Astrid Hulsebosch, teacher at the Ministry of Education, University and Research (MIUR) has a solution for you: just snap a photo of yourself, and use the ThingLink voice recorder to add your instruction to students. In this example. Astrid instructs her students on how to use Flipgrid for their assignment!
4. Art history: Introduce a masterpiece
This is a good example of an interactive user-generated learning resource that can be useful for thousands of teachers. In this case, teacher Irene Londino created an introduction to Chagall’s White Crucifixion, presenting both information of Marc Chagall as well as explaining details of the painting.
5. Literature: Interpret a masterpiece
In some cases, a teacher’s devotion to a subject brings out new forms of art. David Del Carlo, docent and teacher trainer at the The Ministry of Education, University and Research (MIUR), is a connoisseur of the Italian poet Dante Alighieri. To celebrate the national Dante Alighieri Day, David and his students from the Lorenzini high school created a digital experience of Dante’s journey through Hell.
6. Read to your students
Many teachers like to read to their students. It can be challenging to keep this up on a video call over unreliable wifi, but there is a solution: you can easily record your reading on an image and send it to students as a link. In this example, high school literature teacher Ileana Orsini from Turin, Italy, created an interactive audio poster lesson introducing her students to the life and thinking of the Buddha.
7. Learn vocabulary in new places
There are many ways to take language learning out of the classroom to real-world contexts. In this example, Ornella Cappucchini, German teacher and instructional technology coach at Instituto Comprensivo Rovereto Est, takes her students to a virtual house tour, moving from one room to another highlighting vocabulary in German.
8. Narrate your own virtual lesson
Even if you cannot reach all your students at the same time online, you can simulate an in-person lesson by narrating a digital learning experience, adding additional information and questions along the way using sequential hotspots. Professor Barbara Antoniel from Andrea Scotton Technical Institute in Bassano says: “This is a literature lesson on Siddhartha by Hermann Hesse. My objective was to use the flipped classroom method to immerse the student in a process of knowledge discovery through narrative, sound, sensory and visual stimulation.” This year, her institute won the innovative digital school prize in their province.
9. Create a virtual field trip with assignment
The next two examples would probably qualify as a new lesson format. Both use 360-degree images to create a multi-sensory learner journey though a physical place, enriched with various resources and tasks for students. In the first example, Maria Dente used Google Street View photos with illustrations, audio notes, text, photos, as well as embedded word completion games to introduce catacombs to 5th graders. The second example is a virtual field trip to a famous hillside estate, Fondazione il Vittoriale, in the town of Gardone Riviera created by professor Annamaria Bove.
10. Ask students to narrate a virtual audio tour
Teachers and students can collaborate remotely in many ways using ThingLink’s shared folders. For example, a teacher can add base images to a shared folder, where they can be collaboratively edited by students. In this example, 5th grade students of Romea Canini took turns and used their actual voices to tell the legend of the Republic of San Marino, the oldest and the smallest independent state in the world.
To sum up, in the above examples we can on one hand see various efforts to reinvent the traditional classroom experience in an online learning environment. On the other hand we can see plenty of seeds for new learning standards and learning methods using interactive visual media. Although some of the examples include well-articulated learning goals and learning paths that students can explore at their own pace, most examples here help students develop their knowledge and comprehension (see Bloom’s taxonomy).
What’s important is what happens after. With the blended approach, students would next apply the new knowledge in the classroom participating in discussions, group activities and assignments. In the fully online model, the role of the teachers shifts from an instructor to a facilitator of online discussions and meetings. In situations where students cannot access video conferences and online discussions, the learning resources need to include alternative models of asynchronous participation.
What can these models be, and what kind of assignments can students do at home independently that would open up development opportunities on the higher levels of Bloom’s taxonomy?
Supporting student-centered learning with interactive visual media
Project-based learning, inquiry-based learning, and problem-based learning are constructivist approaches to education that develop the learners skills for research, problem-solving and collaboration. The process is based on authentic questions and problems identified by students, and finding information and explanation models to research and solve them.
An important aspect of student-centered learning is documenting the various phases and aspects of the learning process. Sometimes documentation can become the most important learning activity that helps students build a synthesis from diverse elements, using multiple forms of media. The same principle applies to online education. Digital storytelling at its best is an act of putting parts together to form a coherent whole.
The following examples will show how students can use mixed media for completing various kinds of creative assignments and sharing them with their teacher and fellow students.
Best practices for developing students’ creativity and digital storytelling skills at home
School teachers use various visualization techniques as pedagogical tools to engage and help younger students who are having trouble focusing and reading. Educational research suggests that handwriting and doodling notes is better for later memory than typing notes using a keyboard.
When students are working remotely, there are several ways to combine handwriting, drawing, photography, or arts and crafts with student-centered learning projects using ThingLink.
In the following, we summarize 10 easy project ideas for remote learning that encourage students to 1) make handwritten, visual and pictorial notes, collages and artwork, and 2) enhance and explain their work using digital audio/text notes, photos and video. Each of the examples provide a mix of learning opportunities combining traditional student work in the classroom with digital storytelling at home. The projects can be shared to a learning management system or collaboration platform such as Canvas, Schoology, Google Education or Microsoft Teams.
1. Make an interactive greeting card
Project idea: Design an interactive greeting card for a friend or family member. Take a photo of the drawing or setup, and use ThingLink to add your voice greeting or other additional notes.
2. Create an interactive book report
Most elementary school and middle school students read at least 30 minutes every day.
Project idea: Create an interactive book report for each book you have read. Use ThingLink to add voice or text notes about the book.
3. Make a vocabulary poster in a foreign language
This is a true multi-channel exercise that combines an illustration of a word, its written form, as well as its pronunciation in a foreign language.
Project idea: Summarize a list of new words in a chapter or article you have read. Draw/doodle an illustration of each word. Use ThingLink to record the pronunciation for each word.
4. Introduce yourself
Between kindergarten and middle school, students engage in several art projects to introduce themselves to the rest of the classroom.
Project idea: Create an all-about-me poster. Use your phone or tablet to take a photo of it and explain it using text, video, or voice notes.
5. Create an interactive herbarium
Making your own herbarium is a great way for students and their parents to learn about botany and the plants.
Project idea: Go outside and find plants that you don’t already know. Take multiple photos of each plant in their natural habitat, or if you have brought them home, position each on a surface for a photo. Use ThingLink to add more information about them.
6. Make your own comic strips
Self-made comic strips can be used as a visualization technique for any subject. In this example, a 1st grade student took screenshots while playing Minecraft.
Project idea: Make your own comic strip, and add the speech bubbles and sound effects using ThingLink.
7. Create an interactive timeline
Timelines are a great way to memorize sequences of historical periods or events.
Project idea: Make a visualization of a timeline using your preferred technique. Use ThingLink to add more information about each detail.
8. Explain details of a painting
Several museums have recently opened their image archives for public use.
Project idea: Choose a painting and find more information about it online. Use ThingLink to explain the details of the painting to someone who does not know it.
9. Create an interactive map
Drawing maps is another great way to summarize learnings in social studies or science.
Project idea: Draw or paint a map, and use your phone or tablet to take a photo of it. Use ThingLink to add additional information, music, sounds, or interviews to the various spots on the map
10. Build a diorama
Diorama, a three-dimensional miniature model, is a wonderfully creative way for illustrating a story or a sequence of events.
Project idea: Use a combination of materials, techniques or toys to build a scene. Add voice or video narration to your story using ThingLink.
A note on student collaboration
If you have a School licence, students can work collaboratively on projects using Shared Folders. A shared folder is a collaborative space that lets students edit images collaboratively. For example, teachers can engage students by sharing untagged images or videos and invite them to embed text, narration, and videos in the shared resources. Alternatively, if students can access a mobile device and an outdoor space, teachers can create a hybrid learning environment and assign students to create an interactive presentation using their own photos and videos.
Summary of key points
Online learning has been a widely adopted practice in higher education, but there is limited research on how it works in basic education. When students are learning from home, we need to rethink the existing learning system and methods from multiple perspectives, one of which is learning materials and how they can support maintaining the daily connection between teachers and students.
We believe that the quality of online learning can be significantly improved by adopting new standards and practices for online learning materials, including:
- Consistent explanation of key concepts to improve comprehension and vocabulary development
- Affiliation to source information and related discussions to support transparency and critical thinking
- Integrated reading tools to improve accessibility
- Connection to related assignments or activities to encourage further learning
We hope that the arguments and examples in this article stimulate further discussion on the role of visual media in learning including new research-based models for online learning and online classes in elementary and secondary schools. The school based model of education is not dead, but the home base of the school is not anymore a physical building. The home base of the school is in the cloud as the physical environments for learning change.
How to get started with using interactive visual media in my school district? Do I need to involve the principal or the superintendent?
Several districts and principals are now offering new instructional tools and interactive learning technologies including teacher training and staff development options, webinars, and other online learning resources on setting up a virtual classroom and running online classes. There is a fair chance that someone in your district is already using ThingLink. We recommend that you send a note to the person responsible for instructional technology in your school and request a permission for a free ThingLink pilot for your school.
If your district already uses Office 365, Google Classroom, Canvas, or Clever, activating ThingLink for your school is easy!
Start your ThingLink journey today
Get started with creating engaging remote learning resources today with a free trial of ThingLink.
